
Screenshots
Introduction
Here are some screenshots from Mousetrap Mail. Click a thumbnail to open a larger image.
Folders Tab
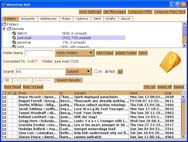
![]() On
this tab, you can manage your mail account folders and your local folders.
At the bottom of the screen, the messages are shown for the current folder.
You can sort by clicking the column headers (shift key for reverse sort).
You can search for mail in the current folder - search results go into
the search tab. The cheese is just there to make you feel hungry.
On
this tab, you can manage your mail account folders and your local folders.
At the bottom of the screen, the messages are shown for the current folder.
You can sort by clicking the column headers (shift key for reverse sort).
You can search for mail in the current folder - search results go into
the search tab. The cheese is just there to make you feel hungry.
Accounts Tab
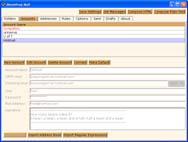
![]() This
tab shows you your accounts. There is a list of account names at the top.
When you select an account name, the account details populate the fields
below.
This
tab shows you your accounts. There is a list of account names at the top.
When you select an account name, the account details populate the fields
below.
Addresses Tab
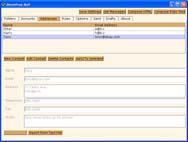
![]() This
is your address book. You can also store contact information here. The
table at the top lists all your contacts; you can select some of them
and press "Send To Selected" to write an email to them.
This
is your address book. You can also store contact information here. The
table at the top lists all your contacts; you can select some of them
and press "Send To Selected" to write an email to them.
Rules Tab
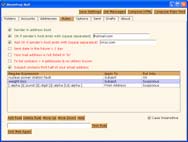
![]() You
can set your mail filters here. At the top of the window are predefined
rules with checkboxes. To use one of these rules, just check the checkbox.
At the bottom of the screen are the user-defined rules. The first two
shown are simple text matches. The third is a more complex regular expression
to find senders with email addresses containing several numbers or punctuation
marks with alpha text between.
You
can set your mail filters here. At the top of the window are predefined
rules with checkboxes. To use one of these rules, just check the checkbox.
At the bottom of the screen are the user-defined rules. The first two
shown are simple text matches. The third is a more complex regular expression
to find senders with email addresses containing several numbers or punctuation
marks with alpha text between.
Options Tab
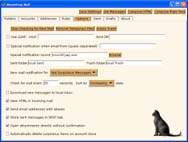
![]() This
is the place to set all your options for Mousetrap. You can set up LDAP,
email notification for special email addresses, and many other options.
Mousetrap settings are saved when you either press the "Save Settings"
button right at the top of the screen, or when you close Mousetrap.
This
is the place to set all your options for Mousetrap. You can set up LDAP,
email notification for special email addresses, and many other options.
Mousetrap settings are saved when you either press the "Save Settings"
button right at the top of the screen, or when you close Mousetrap.
Message Window
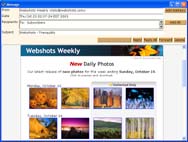
![]() Here's
a sample message. You can see that full HTML is displayed. At the top
of the screen, both the recipients and the sender are listed, and they
can be added straight into the address book with the click of a button.
Here's
a sample message. You can see that full HTML is displayed. At the top
of the screen, both the recipients and the sender are listed, and they
can be added straight into the address book with the click of a button.
Compose Window
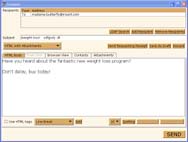
![]() This
is a sample compose window. It's in "HTML with Attachments"
mode. This means the end message will be sent in HTML. You can use HTML
tags by checking the checkbox in the bottom left corner. HTML quick tags
can be added from the drop-down list at the bottom. The font size can
be set and it is possible to embed images right into your HTML with the
"Embedded File" button. Additionally, there is a spell checker
(with customisable word list) available.
This
is a sample compose window. It's in "HTML with Attachments"
mode. This means the end message will be sent in HTML. You can use HTML
tags by checking the checkbox in the bottom left corner. HTML quick tags
can be added from the drop-down list at the bottom. The font size can
be set and it is possible to embed images right into your HTML with the
"Embedded File" button. Additionally, there is a spell checker
(with customisable word list) available.
Compose Window - Contacts
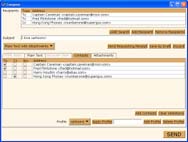
![]() Finally,
here's the contacts tab in the compose window. The contacts list is generated
by your address book. You can check the contacts you want and press "Add
Contacts" to add them to the send list. At the bottom of the tab
you can set up Email Groups (profiles) that store groups of contacts to
send to at the click of a button.
Finally,
here's the contacts tab in the compose window. The contacts list is generated
by your address book. You can check the contacts you want and press "Add
Contacts" to add them to the send list. At the bottom of the tab
you can set up Email Groups (profiles) that store groups of contacts to
send to at the click of a button.

Copyright © Ben Guy 2004
